Monday, December 3, 2018

X-Wing Double Play

I headed up to Chico last weekend for a couple of games of X-Wing at Heroes Corner with my good friend Reno.  There were four players, two Rebel, two Imperial, and I played both Imperial lists.  I brought this:

I got to play Reno first, and he brought three TIE Advanced x1, with Darth Vader, Marek Stele, and Ved Foslo.

Saw Gerrera was separated from his X-Wing escorts pretty early and was quickly shot down by a pair of TIEs.
Skywalker and Tenza focused down Ved Foslo's TIE and there was quite a furball at close range, leaving a single survivor for each side.
The game came down to Skywalker vs. Stele, and the Imperial fighter ended up with the win.


 A close game down to the end, but a beat-up Red 5 couldn't quite pull it out.  Still looking for my first victory.  Second game would be against Steven and a pair of Imperial heavies.

A heavily equipped Decimator and a supporting TIE Reaper quickly took down Skywalker, with lots of dice modification and automatic damage dealing.  I almost took out the support ship, but couldn't quite get a kill.
That Decimator had something like 17 Hull/Shield points, and could dish out 4-5 points each round.  Just didn't have the firepower to even scratch it.


Friday, November 23, 2018

Early StuGs Revisited

Added some crew to my StuG III A Batterie, I had borrowed the previous crew from some other armor of mine as a quick way to get them on the table.  I finally dedicated some time to painting some proper figures for them.


Friday, October 19, 2018

Battle for the Samski Factory

My friend Sam hosted a Stalingrad scenario using the new City Fight rules at Outflank Games in Fairfield, 50 points per player.  Seven of us battled for the 'Samski' factory and the surrounding area on a double length board, and I had the honor of leading the assault on the big industrial complex.

The Factory, held solidly by Clive's Soviet Hero Strelkovy supported by ZIS-2 guns and HMGs.
Attacking from the outskirts would be Russ's traitorous British Rifles and Brian's Panzerkompanie.
My Grenadierkompanie would attack from the industrial side.
After a barrage from my off-board nebelwerfers knocked out the two ZIS guns, my infantry started to make their push for the factory.  
Grenadiers and Assault Pioniers prep for the assault, supported by StuGs and armored cars.
Defensive fire would keep my Grenadiers from assaulting the east side, but the Assault Pios break through on the south side.
Subsequent assaults would see both of my units make their way into the assembly area floor of the factory.
The Grenadiers would hold their position against the Soviet counterattacks, while my Pios made their way upstairs, knocking out several HMGs.
Soviet forces were down to a few stands and pulled back to the northwest room of the complex.  My troops push the attack.
Russ' British finally link up with my StuGs outside the factory after he took massive casualties after attempting assault the complex.
This was super fun and it was nice to team up with Russ for a change.  He brought the wrong army so was stuck helping out the Axis.  The Soviets inside the factory eventually surrendered, and on the other board a massive Soviet armored force was held up by some stubborn Italian defenders supported by Panzers, but enough of them got through that they were in a good position to retake the factory eventually.  Thanks for hosting this Sam!


Friday, October 12, 2018

Rebel Hit and Run

Kevin and I finally got another game of Armada in!


I brought a similar force to what I took last time:

MC80 Battle Cruiser
    -Mon Karren
    -General Dodonna
MC30c Scout Frigate
    -Redundant Shields
    -Assault Concussion Missiles
MC30c Torpedo Frigate
    -Assault Proton Torpedoes
GR75 Combat Retrofits
B-wing Squadron
B-wing Squadron
X-wing Squadron (Luke Skywalker)
X-wing Squadron
X-wing Squadron
Y-wing Squadron

Kevin had a pair of Victory-class Star Destroyers, a Gladiator-class Star Destroyer, a Raider-class Corvette, IG-88, and a ton of TIEs.

Mon Karren and her escorts deploy in a broad line, with fighters and attack bombers close behind.
The Empire deploys her fighter screen well forward, reaching my forward elements before my X-wings can reach them.  The Raider-class takes heavy damage from a barrage of assault torpedoes. 
Mon Karren engages a pair of Star Destroyers alone, battering the Victory-class.
The situation after three turns.  The second Victory-class closes on the MC30 frigates.  The Raider is destroyed soon after.
Mon Karren narrowly glides past the pair of Destroyers, but her shields are heavily damaged.
TIEs make repeated runs on my MC30, but it holds fast.
The Imperials escape any more major damage, while shooting down most of the Rebel fighters.  
Total losses amounted to a Raider-class Corvette and a TIE Fighter squadron for the Empire, and four squadrons of fighters lost, including Skywalker's for the Rebels.  52-57 Imperial advantage.  


Sunday, September 16, 2018

X-Wing 2.0

I had a chance to try out the new 2.0 rules for X-Wing and I enjoyed them quite a bit.  The game had become pretty bloated after so many expansions, and the new app support seems to work pretty well. I took three X-Wings and my friend Reno had three TIE Advanced.

Luke Skywalker went head-on vs. Darth Vader and scored several hits, knocking out his shields early.  Unfortunately that wasn't enough, as the younger Skywalker was shot down on the next turn after some seriously lopsided rolls!  Jek Porkins and another Red Squadron Veteran fought a valiant battle, but in the end Vader was just too strong.

Sunday, September 9, 2018

Pacificon 2018

We had ten players for an 80 point North Africa MidWar event at Pacificon this year in Santa Clara.  I brought German 90th Light Infantry, a formation with some interesting and rare support.  We would be using the Fog of War cards, which were provided by Battlefront for the event.

In the first round I would play Mason and his British Churchill Armored Squadron in Free For All.

I used my recon to get my infantry up a few inches, but Mason would go first.  He used a card to mark the 8-rads for death, and knocked them out, immediately scoring two points!
My Dianas would hold this side and Mason didn't want any part of them.
After a good bombardment knocked out two of Mason's 25 pounders, I used a card to target that position, hoping I'd earn some points if I took it.
Mason concentrated his Churchills in the center of town, and deployed a card which would be worth 2 points to whomever held it near the walled mosque.  I would get there first, but he could take it from me.  I used a card to make one of the buildings in town worth two points to me.
If Mason's heavy tanks took this position he would secure enough points to win.  I would need to hold on.
I moved my PaK36 (r)s to engage the Churchills and knocked one out.  I held on long enough for my other forces to secure enough points for the win!
I'd win this one 8-3, with my 25 pounders winning a gun battle with Mason's.

For round two, I'd be playing against Tim's German Afrika Rifles in Dust Up.

I held the corner pretty solidly, with artillery, PaKs, and two infantry units.  I would up playing pretty defensively until my reserves arrived.
When the Dianas came on they caught Tim's Marders from behind, knocking one out.  The other three would fall back behind cover.
My reserve infantry would advance, taking a card position and earning several points.  We would ultimately run out of time.
I still earned six points in this one, and had I pulled off an assault in the last round I might have broken Tim's formation.  6-2 draw.

I was matched up against Russ and his Italian Tank Company in Free For All in the final round.

Both of us would set up defensively, and didn't really want anything to do with the large open center.
Russ would commit six points worth of cards to the pass, and I knew it would be an easy victory for him if I let him take it.  My PaKs would hold the approaches, but once he got in there he could just sit and fire at whatever came near.
Meanwhile on the other side, my Dianas fought a duel with some M14/41s, one that they would eventually win.
I had several points worth of cards counting down towards victory and just had to make sure Russ couldn't push me off of the embankment.  He was able to destroy most of my guns with his Semoventes, but the Dianas just kept killing little tanks. 
I would win 8-2, as most of Russ' cards were tied up in the pass.  He would've won had he cleared it.

I would score 22 points for the day, good enough for second place and Best Axis (Brad's US Armored Rifles would score a perfect 24)  Thanks to Dave for hosting, and thanks to Battlefront for not only enough cards for everyone who attended, but for great prize support, too! (four copies of each of the new Eastern Front V4 books)


Saturday, September 1, 2018

90th Light Afrika vs. Italians

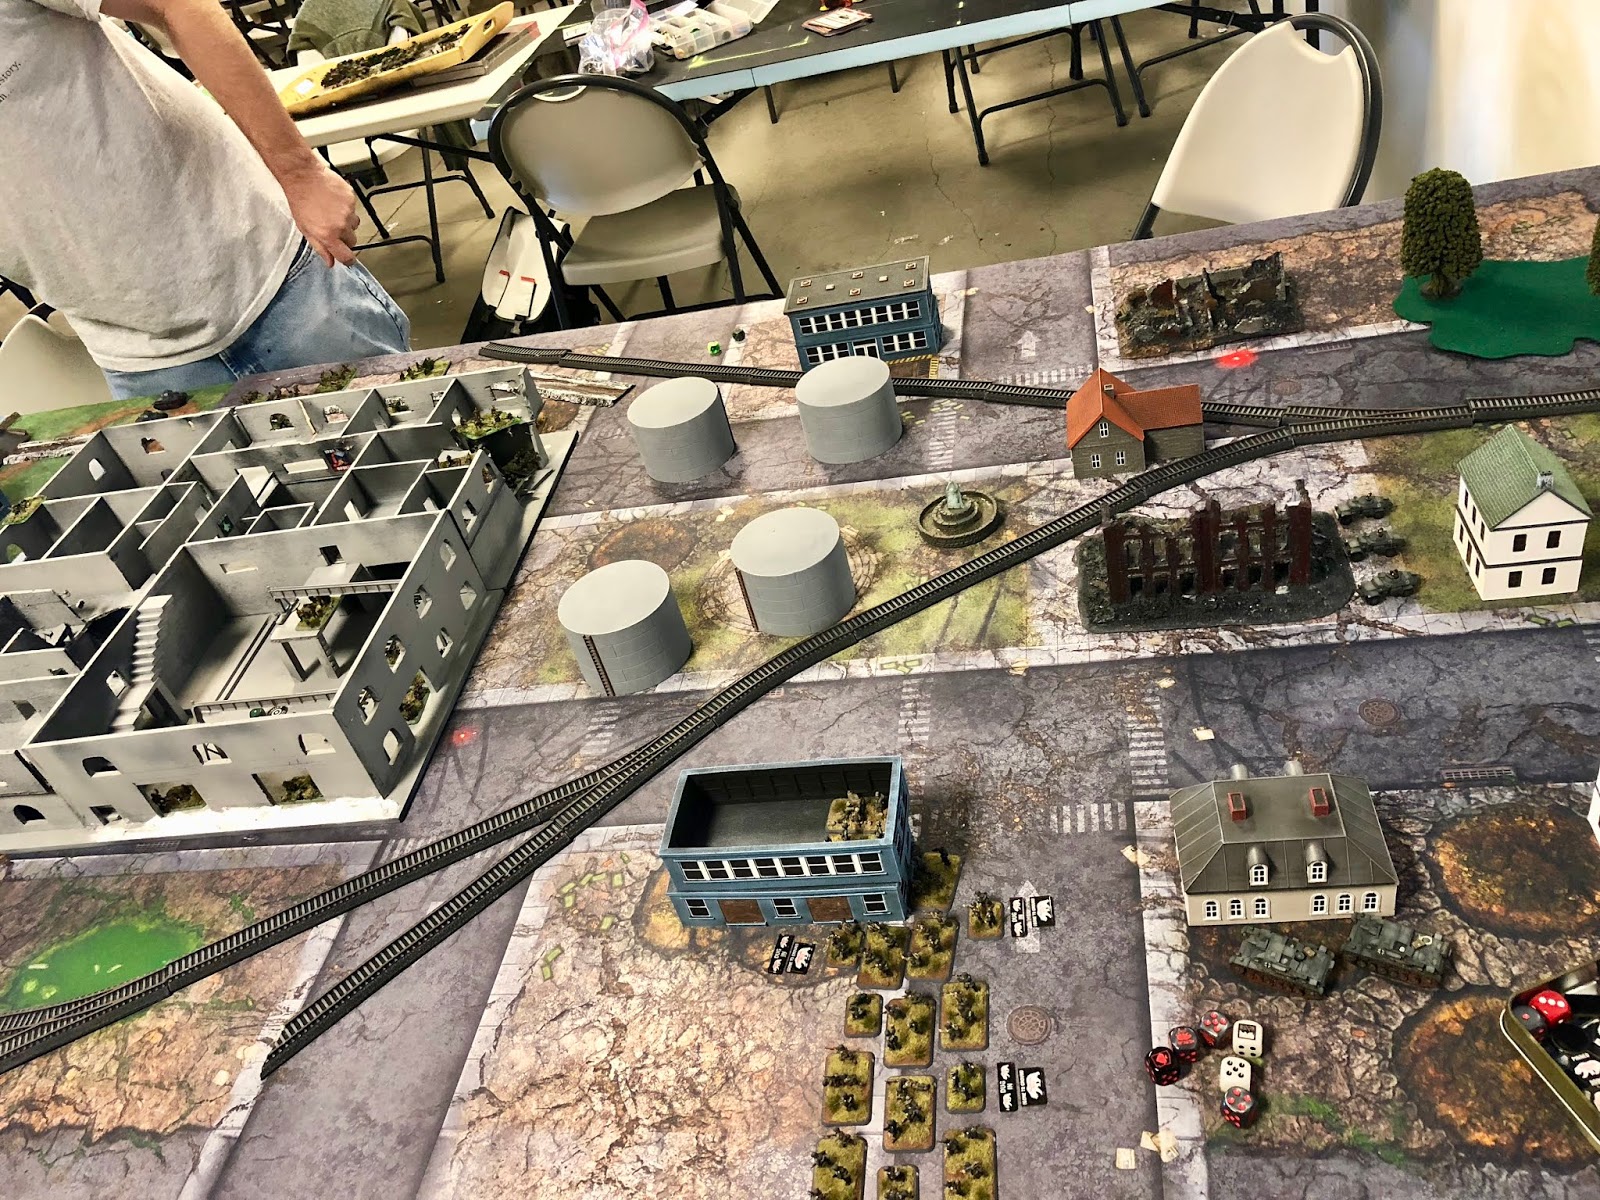
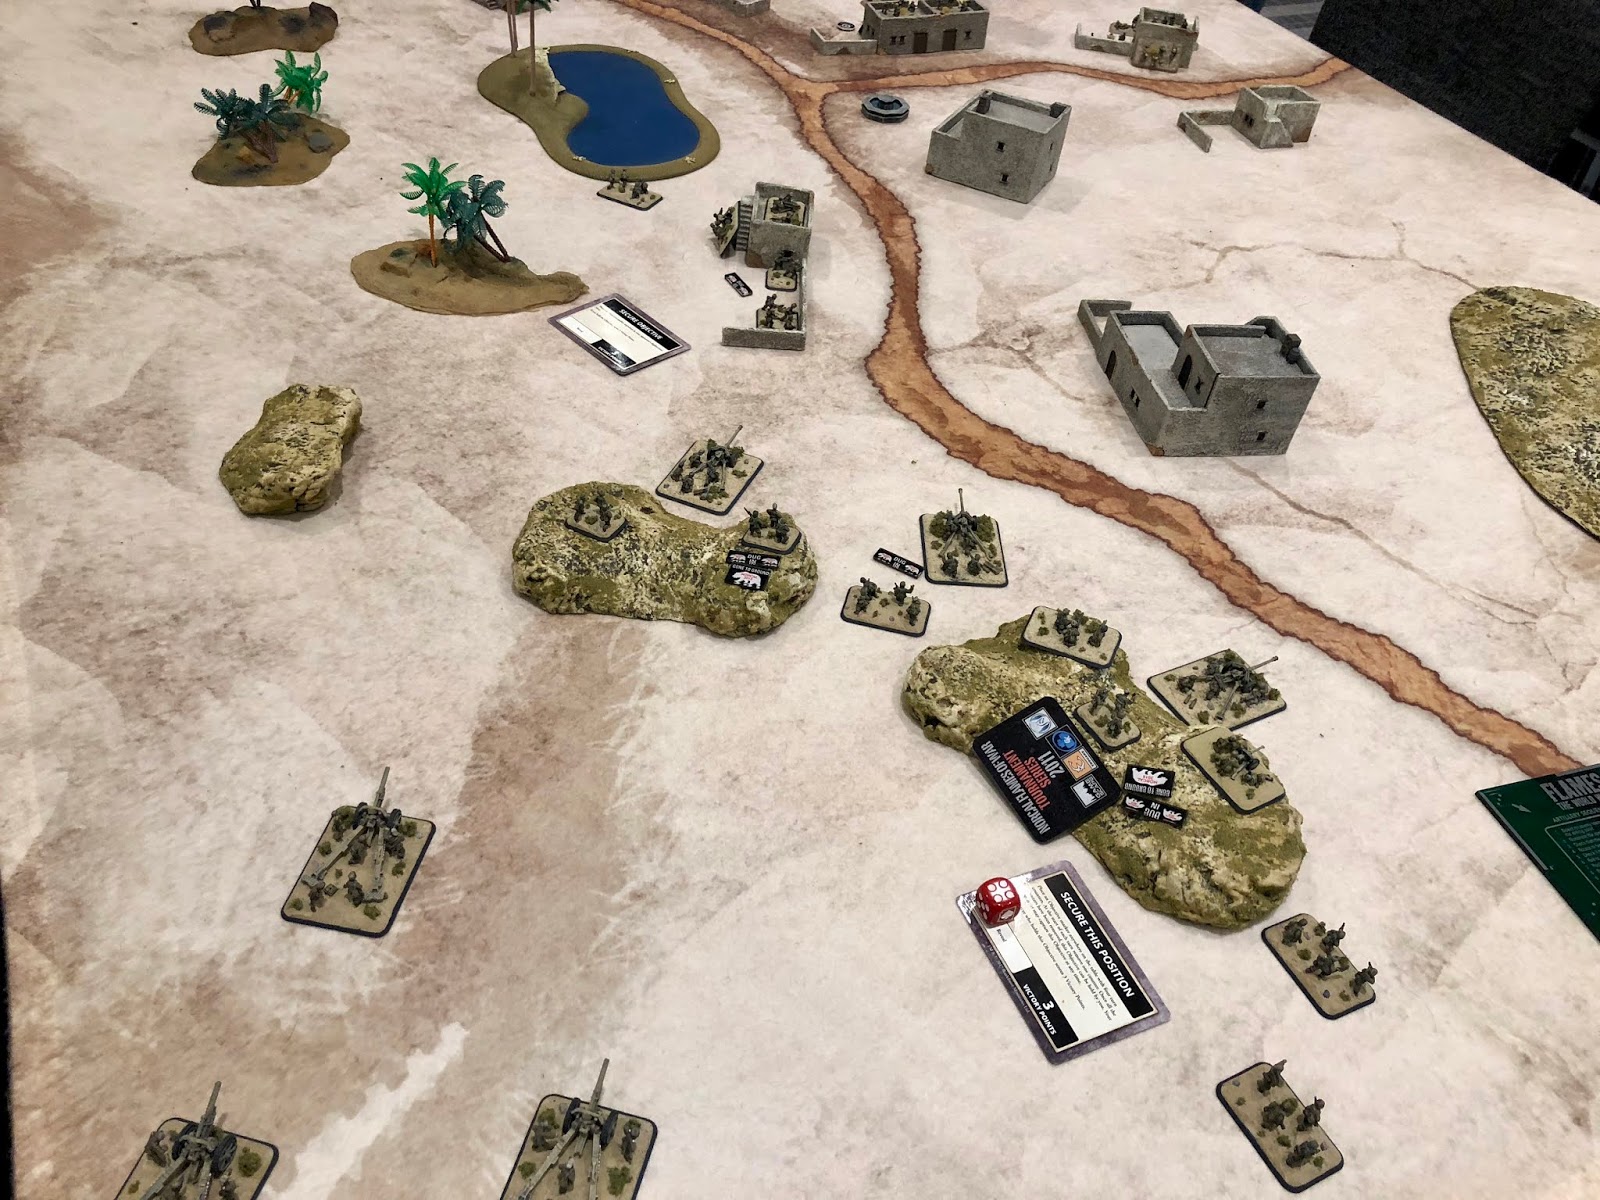
Hal and I found time for a game to test out some 80 point lists for the upcoming MidWar event at Pacificon.  I built an infantry list using the 90th Light Afrika Rifle company so I could try out the 76.2 cm PaK36(r)s and Dianas.  I also took captured 25 pounders, as those were in the division, and a pair of Panzer IVs to sub in as the unit's pair of StuG Ds.  We played Free for All.

2 HQ 2x SMG
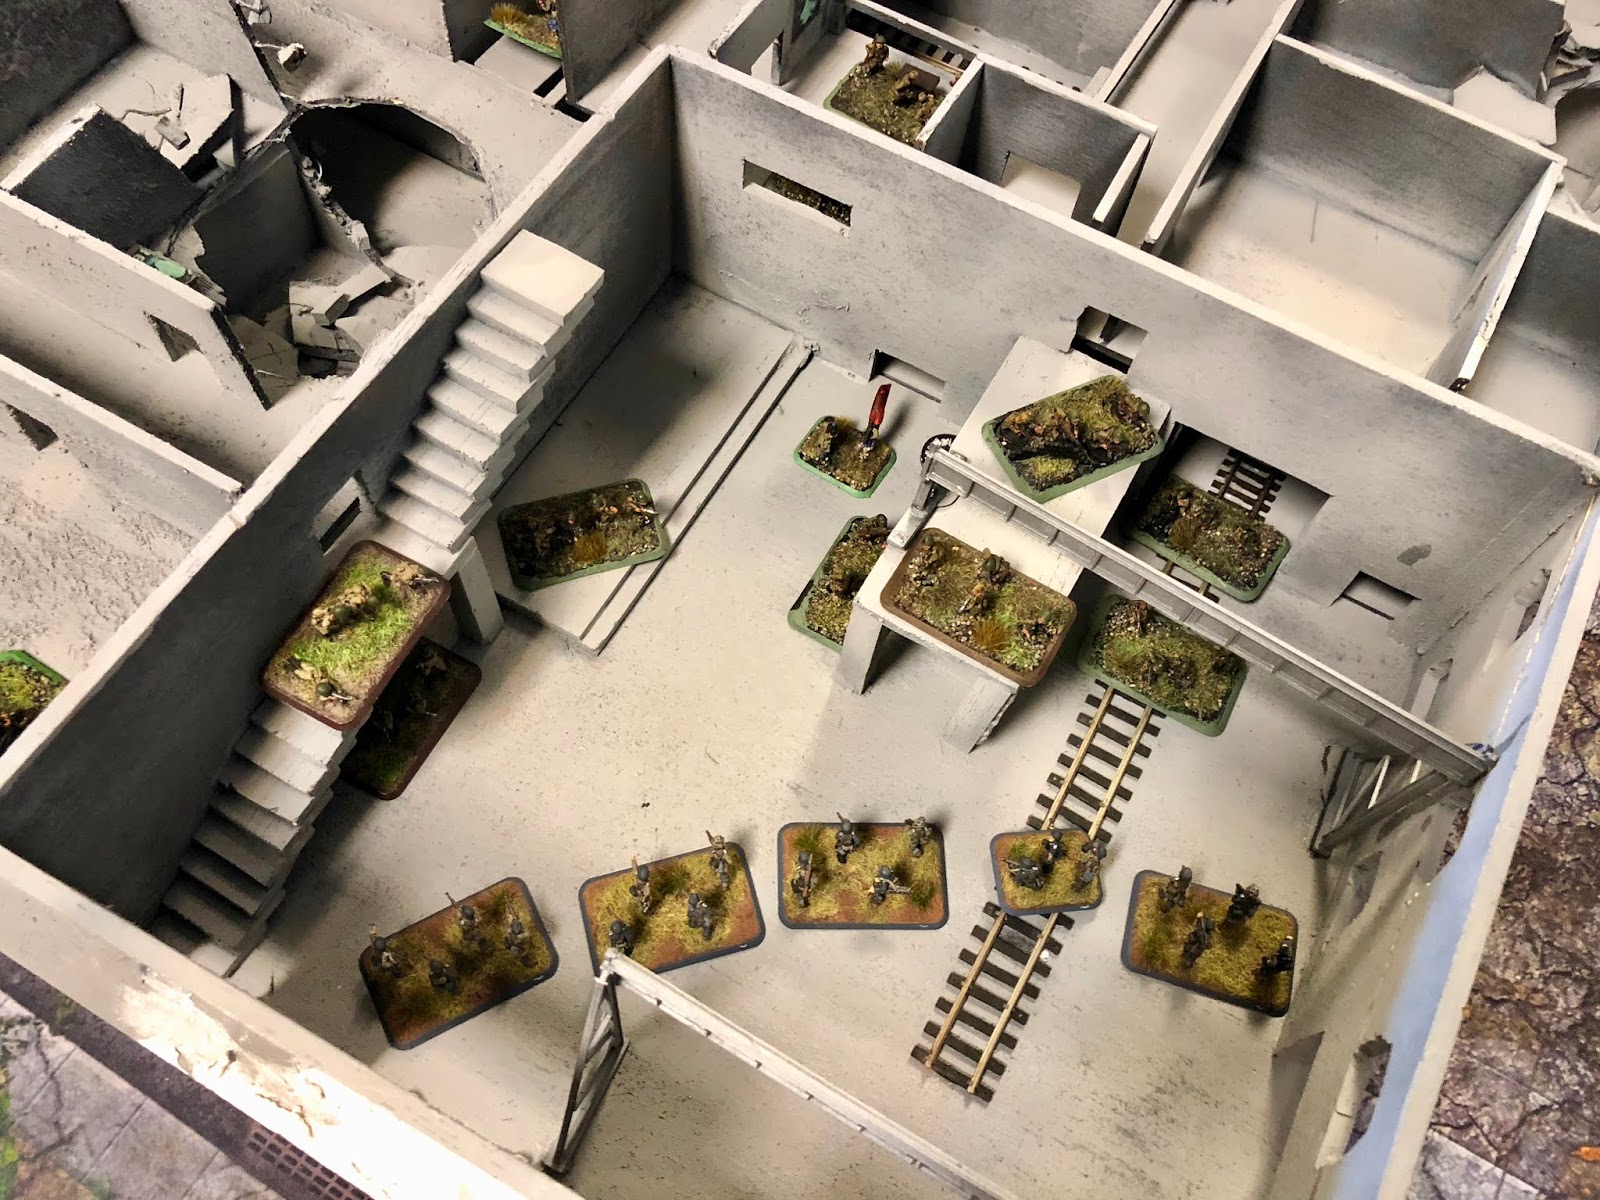
8 Rifle 4x MG34 1x 2.8cm ATR 1x HMG
15 ATG         3x 7.62 ATR
14 Artillery 4x 25 Pounder
10 Diana 3x Diana
12 Panzer 2x Panzer IV E
2 Scout 2x Sd Kfz 231

1 Brandenburgers card

Hal took an Italian armored list supported by 88mm AA and infantry.
I used my recon to push my deployment up a bit and gave my PaK 36(r)s some better shots.  My infantry move to occupy the buildings, while the guns knock out a tank at long range.
Unfortunately the Italian artillery ranged in on the first turn and immediately knocked one of the guns out.
My PaKs lose to the artillery, and my armored cars are forced to try and slow down the Italian tanks, but they fail.  They would immediately run for it.
The infantry and their anti-tank rifles would need to hold, and they do!
Support fire from the Dianas and several well-placed ATR shots would see the M14/41s all destroyed.  Time to advance!
My Panzer IVs aren't able to hold back a unit of Semoventes.
They would advance and try to capture the objective.
The formation commander's tank would hold long enough for the Semovente's to win out.
I think I did pretty decent against a large force of light armor, though I learned that four Semoventes are better than two Panzer IVs!  I also need to use my artillery earlier to disrupt opposing batteries.


Wednesday, August 15, 2018

Churchills vs. Panzers

Russ was in the neighborhood and we got a quick game in at Great Escape.  We played Free For All and Russ brought Churchills and Shermans against my Panzer IIIs.

Russ' Churchills and a battery of 25 Pounders hold this side of the board, so I use my Panzer IIs to increase my deployment a bit.
My Panzer IV Fs try to hold off the now advancing Churchills.
My Schleppers and the 25 Pounders trade shots, Russ losing two while I lost one.
I lost one Panzer, which caused them to break and run since they weren't in command.  Not really a fan of that new rule.
With only Panzer IIs to hold the Objective it was only a matter of time before the Churchills run them over.  My Panzer IIIs spent the game dueling some Shermans to no result.
Well, this game was quick!  Once the Panzer IVs ran it was over, but really it never looked good.  Un-upgraded Panzer IIIs have no chance vs. these newer tanks, even with some numerical superiority.  Panzer IVs are overpriced, but I really don't want to use Marders, either.  Not sure if this Panzer list will work after all against these new British heavies, and once the Soviets appear, they're probably toast.