Showing posts with label Terrain. Show all posts

Friday, March 1, 2019

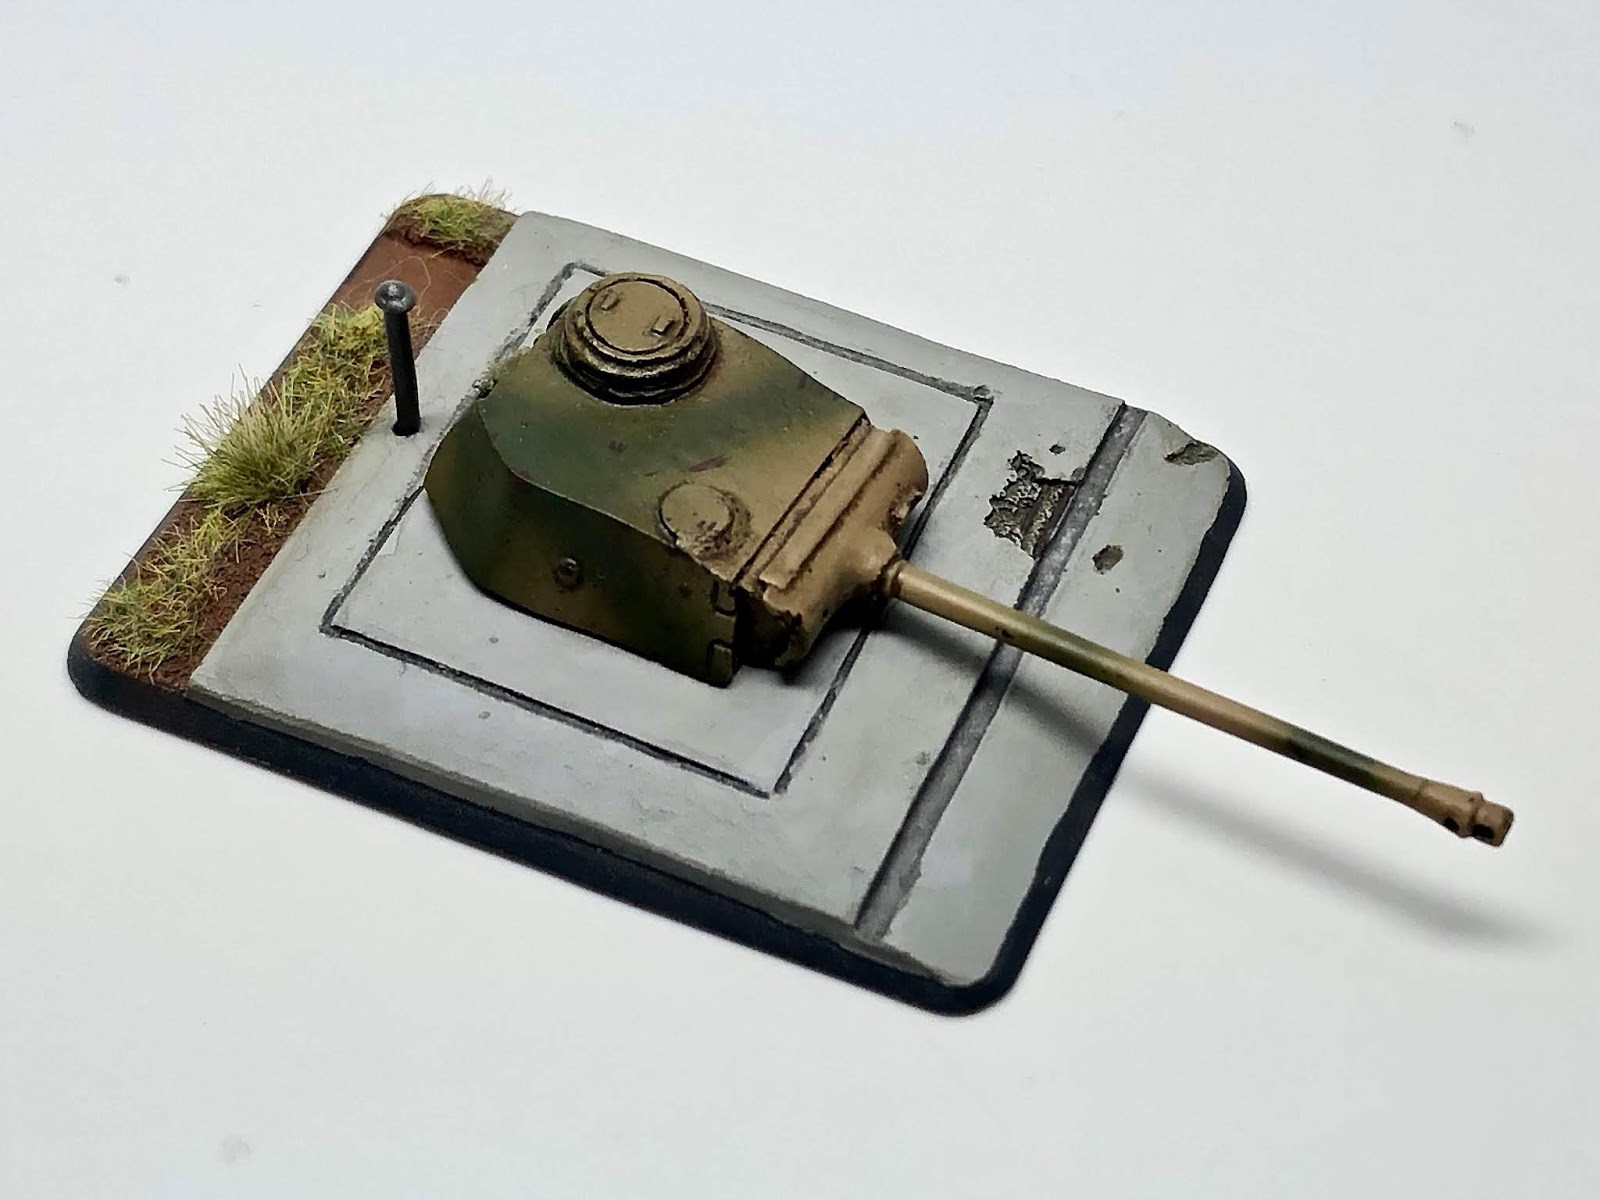
Tank Turret Bunkers

I've gone back into my Un-Finished Objects (UFO) box and decided to finally complete some bunkers I started way back in August of 2017.  While working on them I dropped my airbrush twice and had to order replacement parts both times as I broke two different parts, only times I've ever dropped it.  I now consider these things cursed and with the changes to lists in V4 I may never even get to use them.  Oh well, at least they're finally finished!

Link to my previous work on them:
HMG Bunker

All Battlefront models.  Pretty happy with the Panther Turrets, they saw action in Italy along the Gothic Line, etc.
Not super happy with the concrete, but they're done.
Happy with the camouflage though.
R35 Turret, seen in Normandy.
This one might actually see the table one the new D-Day books come out in June.
5cm KwK Bunker.  This one might see some table-time too.
Gun close-up, it's magnetized, too.


Monday, March 26, 2018

Quick Allied Objective

I painted this Allied objective to give it as a prize at a Flames of War tournament I hosted a few days ago.  I used some German casualty figures and a pair of British Paras that I think were originally tank riders, and some old objective that I've had in my stash for about a decade.  Logs and wood still give me issues, and it came out a little shiny as I didn't have my usual brand of matte varnish available, but I still think it came out ok.

I added some extra sand bags with green stuff, to give the Brits something to sit on.
Simple, but it only took a few hours from start to finish, most of that on the figures.


Monday, August 28, 2017

6MMRPC Week Eight: HMG Bunker

So, I had a chance to work on those bunkers from last week a bit more and finished them as far as I can without an airbrush, which is packed in a box somewhere.  Once I get established in our new home, I can finish the gun turrets for the rest of them.
I started by leaving the gray primer color on all of the concrete area, then built up a few layers of varying grays by drybrush.  I then did any detail areas with Vallejo acrylics.  Once that was done, I used a few colors of acrylic wash from Secret Weapon and then did the ground area with washes and dry pigments before adding some static grass and tufts.
I get to count the single finished bunker towards my mountain reduction, but I'll consider the rest almost done.

Rear area with MG port and enfilade walls.
Forward area with MG port.
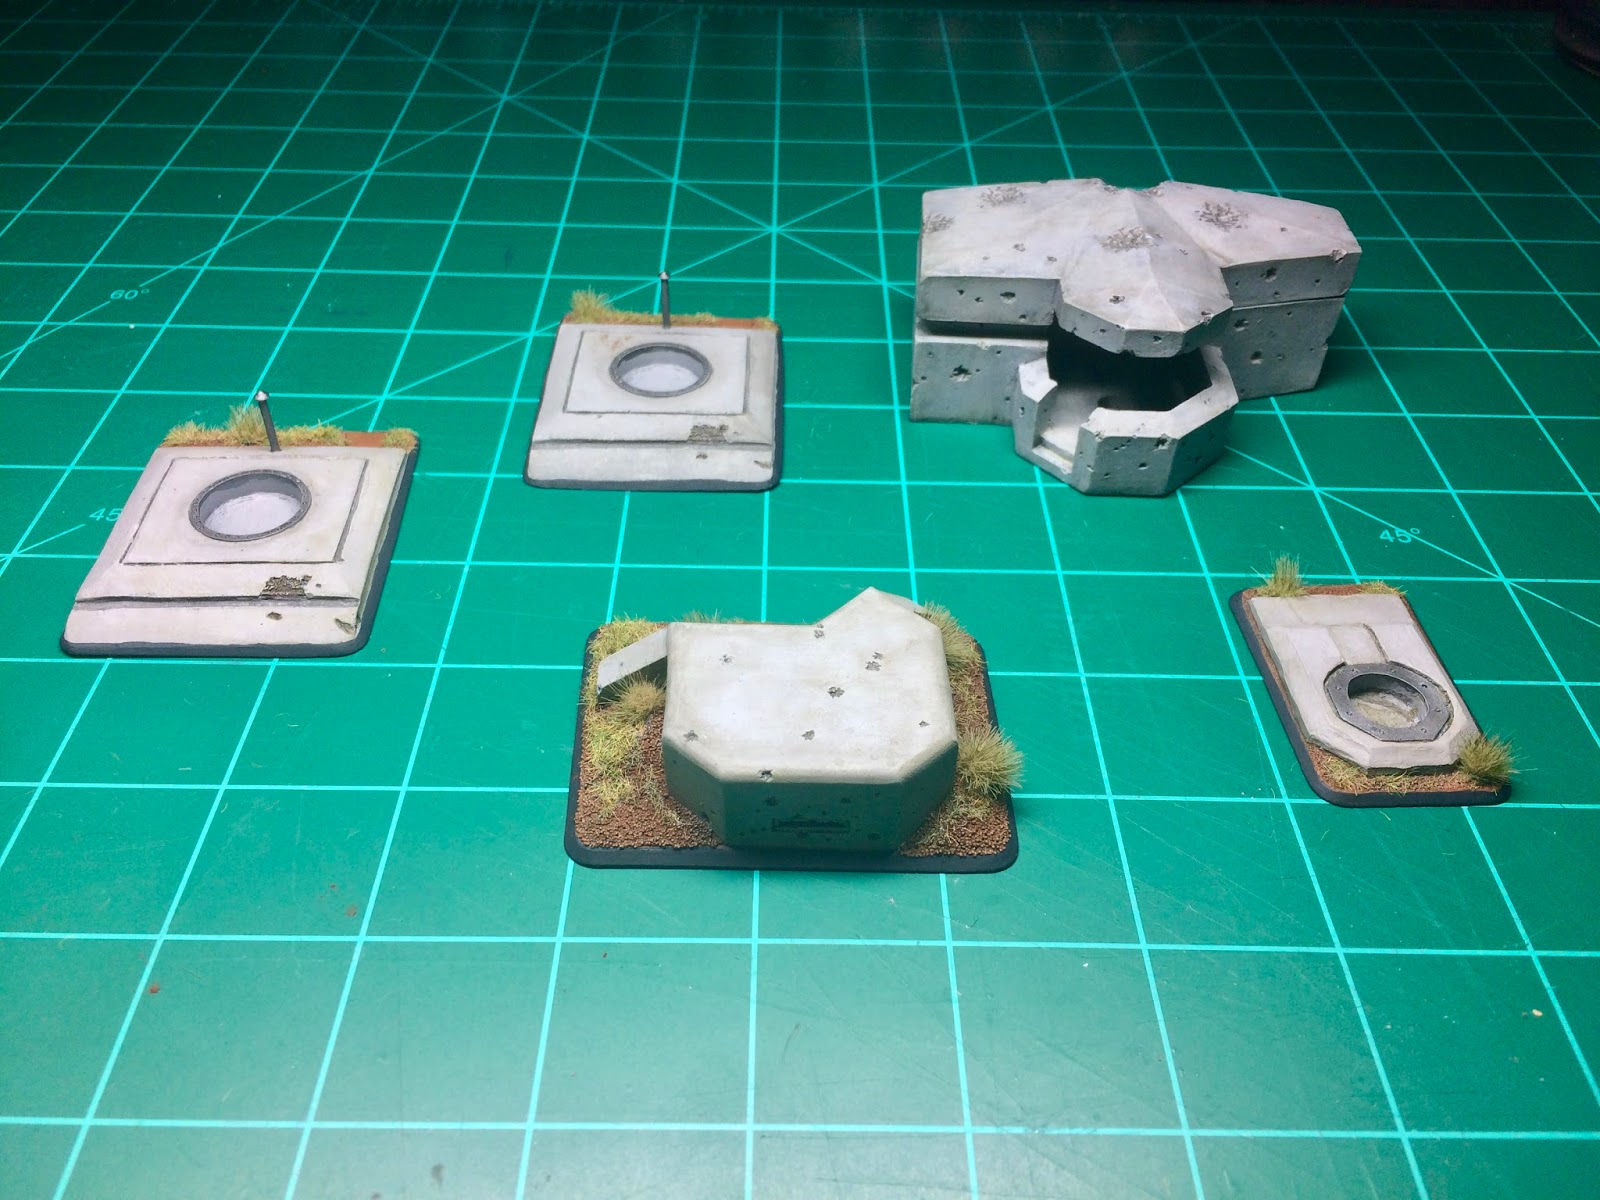
The two large bases can fit Panther, Panzer IV, T-34, or P-40 turrets, the smaller can fit Panzer II, or several french designs.  The large bunker is for a 5cm KwK gun.
I probably won't have much else to show for a few weeks, almost time to leave Tatooine!


Monday, August 21, 2017

6MMRPC Week Seven: Bunkers In Progress

I managed to get some work in on the bunkers, just need to do a few washes, some weathering, and some basing work still.  I should have these done by next week, minus any guns or turrets since my airbrush is all packed away.

I hate weathering concrete, it never looks right...

Tuesday, August 15, 2017

6MMRPC Week Six: Building Some Bunkers

While continuing the packing process in preparation for moving, I kept my eye out for projects that I could work on simply, since most of my collection and my airbrush have been boxed up.  I stumbled upon several old bunkers and gun nests that have languished in a forgotten box for several years and I think these should prove to be simple enough to work on without most of my tools.  Hopefully I can get some of these completed by next week.

Two Pantherturms, two gun nests, a 5cm KwK bunker, and a HMG bunker.  

Wednesday, November 25, 2015

6MMRPC Week Twenty-Five: Animated Weapons, More

Finally something I can call finished!  I wrapped up the Animated Weapons, a Shadow, and an Orc, all from Mantic Games.  They were previously featured here: http://flamesofnerd.blogspot.com/2015/09/6mmrpc-week-sixteen-animated-weapons.html

I used railroad ballast mixed with some other larger rock for the basing, washed it with a Dark Sepia from Secret Weapon, added a drybrush of Vallejo Medium Brown, and then painted the edges Black.  The static grass is a mix of colors from GF9 and the tufts are from CGR.  Didn't take long to finish these once I got back to them.

Orc: Challenge Rating 1/2 Humanoid
Shadow: Challenge Rating 1/2 Undead
Animated Weapon: Challenge Rating 1/4 Construct


Test model for a band of mountain orcs, dual-wielding hand axes.
Extra bits bashed into a stand-in for a Shadow.
Couple of swords, also extra Mantic bits.
Axes!  Animated Weapons are fun!
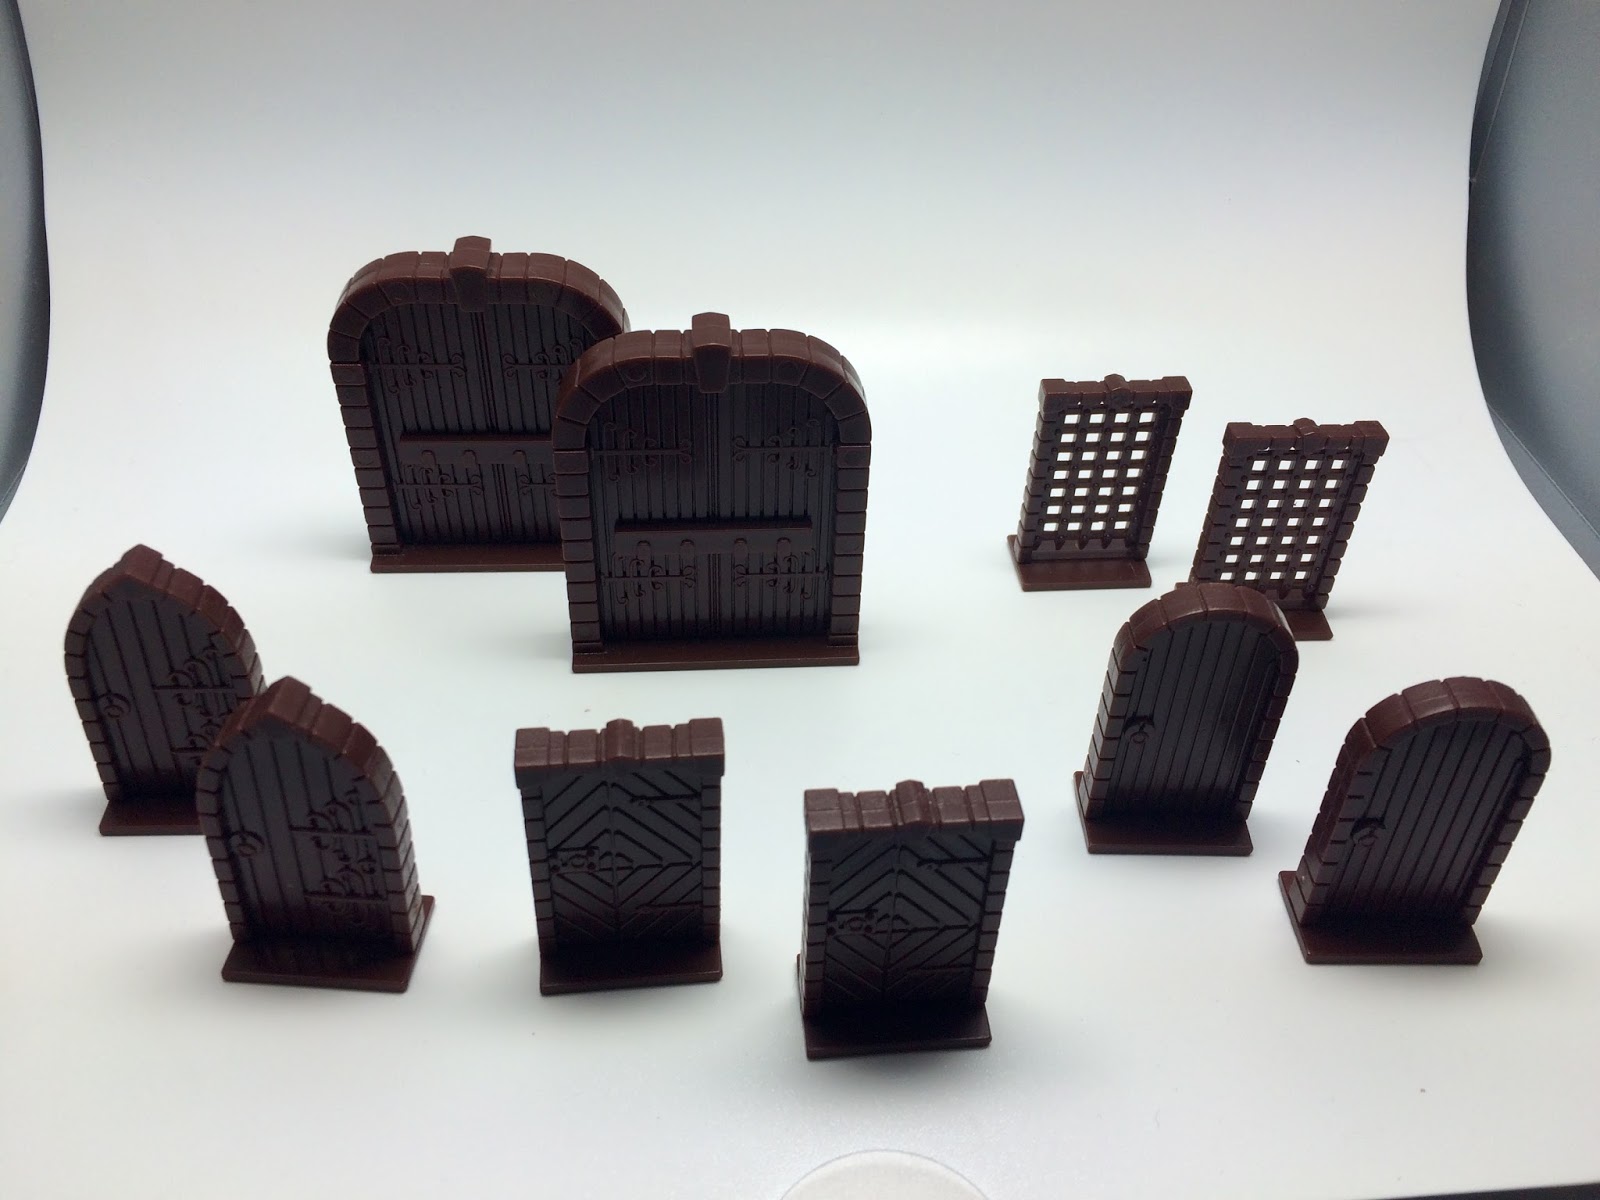
I also received my dungeon furniture from Mantic Games' Dungeon Saga Kickstarter.  I signed up for these in August of 2014 and I was a bit surprised to see them after all these months, having basically forgotten about them.  The doors and furniture should look nice on the D&D table.

$5 got me two large doors, six small doors, and a pair of iron doors.  All are made from hard brown plastic.
More barrrels and chests!  The chests all have separate lids, tables are nice too.
For $15 I got a Dwarven Throne, two different bookshelves, a weapon rack, a well, a large chest, and a bookstand with a separate book, plus the two tables, four barrels, and four chests from the previous image.  These are molded in a softer brown plastic.
I'm pretty satisfied with these, especially the larger furniture.  I'm glad I ordered two of each set.

I get to chop six D&D minis from the Mountain!


Tuesday, October 13, 2015

6MMRPC Week Nineteen: D&D Terrain Scenery

I finished the Dungeons & Dragons scenery bits from Baueda that I primed last week, and worked on a few other things as well.  No zombies though.

These were pretty simple to paint up, I airbrushed them with Tamiya colors and then painted the details in with Vallejo acryllics.  A quick thinned-down wash of Secret Weapon's Dark Sepia, a drybrush of Vallejo Iraqi Sand, and a quick spray of Matte Varnish seaded the deal.  These should look nice mixed into the other items I painted up several months ago, or in the back of a wagon.

All of these are from Baueda except for the large chest on the right.  Got that in a pile of bits at a swap meet.

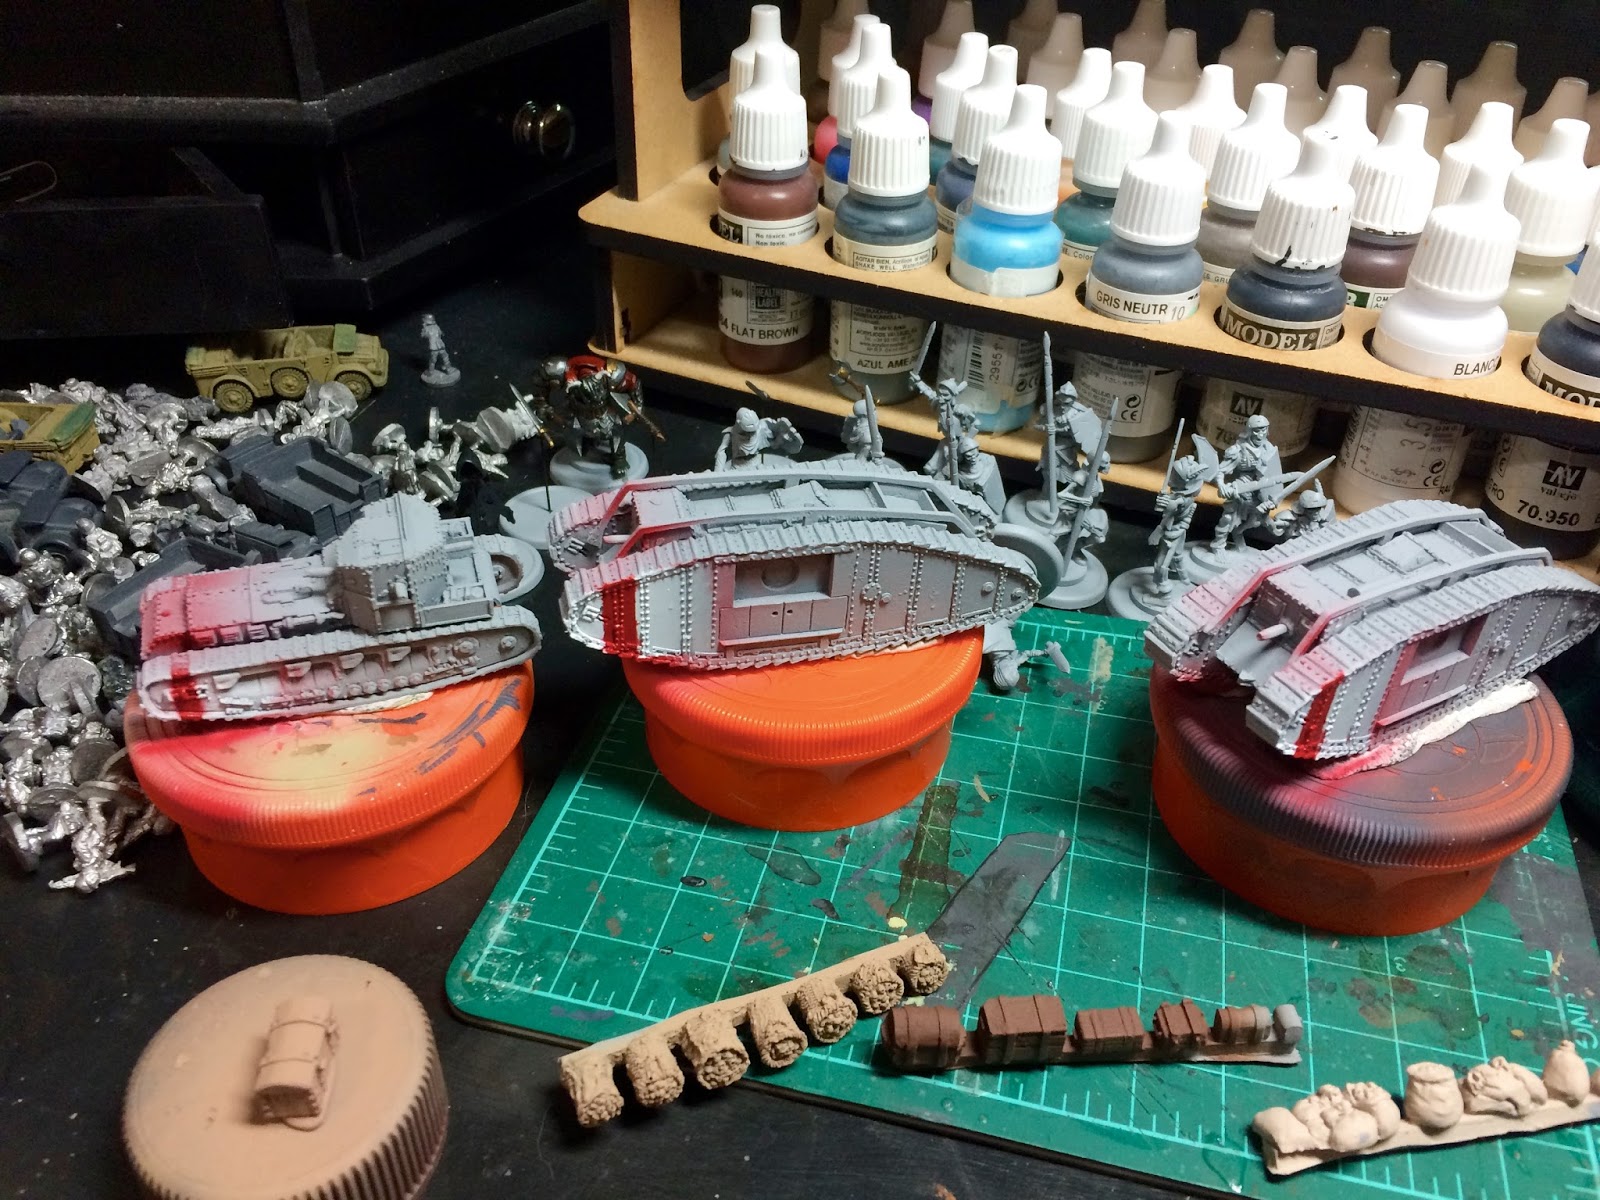
I also got some work in on the Great War landships, masking and painting their identification stripes was a pain, so many rivets and other odd bumps wouldn't let the masking tape settle.  I'll need to touch them up later.

I hope to get these finished up this week.
 I even got the base color down on the Ki-45, though it came out a bit green.

Making some progress on several fronts!

I finally get to check something off as finished!  Three piles of terrain taken off of the Mountain!

Sunday, July 26, 2015

6MMRPC Week Eight: Star Wars Kit-bashing

First off, I'd like to thank Battlefront for all of the attention they've directed at this blog.  I had no idea they were going to put direct links to my Historicon reports on their front page.  Thanks also to the readers I was able to talk to out in Virginia.  It was really nice to meet you.  I had a great time and I'm sure I'll make the trek again next year.

I got off pretty easy at the swap meet and vendor hall, mostly thanks to this challenge.  I spent a total of $35, mostly on stuff for Flames of War.  I spent my first joker at the swap meet though, as someone had a bunch of old OOP Battlefront vehicles for sale and I grabbed three GMC 2.5 ton trucks for a future 150. Panzerbrigade list.  Sneaky Germans using US equipment should be a fun modeling opportunity.  I also got an opened blister of 10cm NW40 heavy mortars for my Mid War Luftwaffe Feldkompanie, just need to find one more gun for the battery.  $22 spent.  I bought nine bags of bits and three sheets of decals for a total of $13, and scored a special Soviet objective and a unique figure just for attending.  I've already sold the objective for $20 to a local guy, and made most of my money back!  On to the update!

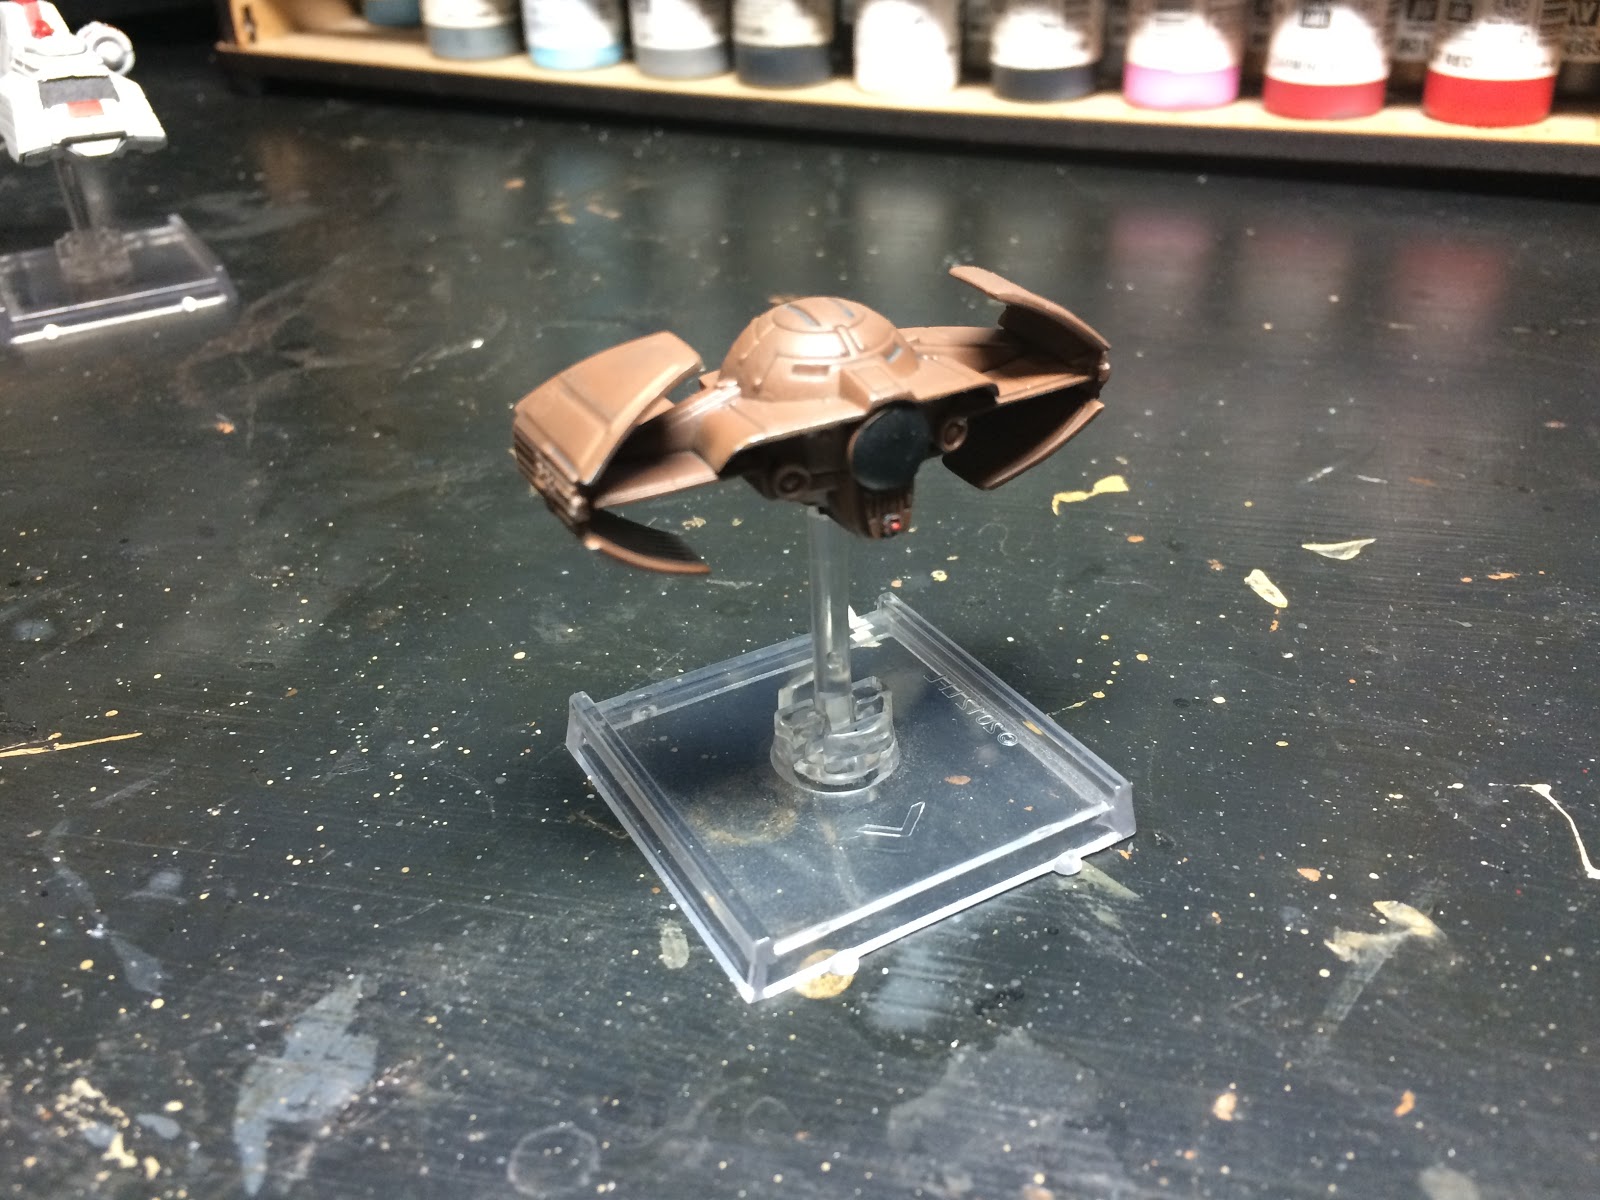
I finally got some paint on these models for friendly X-Wing games.  I bought some old model kits and a few old Micro Machine toys months ago to bash into some different ships, built them awhile back and left them sitting since.  To break the Flames of War routine, I decided to break them out.  First, I airbrushed the Imperial ship and satellite Tamiya Sky Grey, they added some White for two Rebellion ships.  The Scum ship is a red-brown color I had pre-mixed.  After that, I painted in the canopies and added a few spots of detail.  I only spent a minimum of time with this, as these are pretty low on my gaming priority.  I haven't played X-Wing in over six months.  After the paint was dry, I used a MIG Light Grey wash, sprayed on some varnish, and called them done.  I got these painted up over about two days, they came together very quickly.

An Imperial customs patrol ship, loosely based on a YZ-775.  I used an Action Fleet Republic Cruiser, chopped and swapped it, and built the cockpit from a 1/72 Mitsubishi Zero canopy.  Guns from FFG E-Wings.
A modifed YT-1300 based on an old design by West End Games.  This was a Revell snap-tite kit, I also used several parts from a 1/72 Robotech Valkyrie kit.
Rebel shuttlecraft, got tired of using the cardboard cut-out that came in the starter.  This was built from severeal small-scale Ertl snap-tite kits, mostly the MTT.
A Scum faction scout ship, an Ertl Sith Infiltrator that's been hacked up a bit.
A comminications relay satellite built from a Micro Machine tibana gas something-or-other and the dish array from the Republic Cruiser.  I'll use this for scenarios.
Not a bad haul for a net of $15.
That's five Star Wars models removed from the mountain, and seven Flames of War minis added to the pile.  I also spent my first joker.

Sunday, June 14, 2015

6MMRPC Week Two: Another Display Board

Display boards have become a staple at Historicon and I need to put together a new one for my Early War list I'm bringing to FoW Nationals.  Because of several factors I haven't had time to paint a Japanese force for the event and have had to reuse the Fallschirmjägers from two years ago. The list is a glider-borne assault pionier list at 1390 points.

I still need to paint a platoon of four 3.7cm PaK36s, an 8cm Gw34 mortar stand, an observer team and an Objective, plus three more 8cm mortars to swap onto the existing stands so they are the correct type.  The display board will be mounted into the frame I used last year, and I had the MDF and foam left over and ready to go. Some of the bases for the FJ have cobblestones and I wanted to have a section of the board match but I also wanted to match the rubble bases as well. Part of the board will have a bombed town and the other part will be a farm / vineyard.  Since these are glider troops I also want a landed DFS 230 on the board, in the vineyard. Some wall sections I picked up from the swap meet at Historicon will do nicely as accent pieces and will go with my previously constructed Objective.

Basic layout so far, the cobbled road will run along the walled courtyard. 
Wanted to get more done this week but the wife is on temporary military duty out of state and my boys have kept me busy. Next week I'll have some paint to show. Promise!

Also, thanks to Battlefront for mentioning my blog on their website!  I'm greatly humbled that anyone there has noticed this little hobby log of mine. 

Tuesday, March 17, 2015

Flames of War Display Board

I built this display board for last year's Historicon but never posted any pictures of it.  I was inspired by the boards in 2013, most notably Dennis Campbell's.  I designed it to be mostly neutral, that way I could use it for multiple armies, but also wanted to represent some rural location that could fit the Eastern Front theme of my list last year.  I knew I needed a pretty large flat place for all of the infantry, a road to put the tanks on, and I also needed some kind of focal point to draw interest.

I layed out my army and how I wanted it to sit, then marked a rough idea of where I needed to make the terrain.  I decided to put a hill in the back left corner to give the board three height levels, and a creek on the far right edge.  A bridge would give me my focal point.
Pink insulation foam and a shadow box picture frame.  I think most display boards start life this way.
Marked so I don't cut the creek bed to wide.  Got to try out a foam cutter for the first time.
Because the creek would run all the way to the edge of the frame, I needed something to box in the edges.  Aluminum angle cut, bent, and welded.  This would give the board rigidity while still keeping it ight enough to carry comfortably.
MDF cut to fit into the frame, this would give the creek a botom and also provide added strength.
I sanded down into the foam to create a rutted road.
All together in the frame.  White glue and some c-clamps would keep this until dry.  One nice thing is that the entire assembly can be removed and swapped.
The hill is just a piece of scrap foam.  I imbedded the tree bases into the foam so that they could be removable for transport.  A piece of bark will be burried in the hill to provide some contrast.
Fine grit sand spread around most surfaces.
Flocked.  I tried a spray adhesive but it stayed too tacky.  Had to use watered down white glue eventiually.
With the flock finally dry I could fit the bridge.  It was some kind of balsa Roman-era footbridge but I was able to modify it to look like a rural Russain bridge.  Pilings woud be permanent but the ret of the bridge could be removed for transport.
Trees placed and a fence added from scrap balsa.  The fence really brought some visual interest to the foreground.
Close-up of the bridge.
Close-up of the fence.
Tufts, flowers, bits of flock added.  I also stained the balsa with enamel washes.  Dry pigments also added the the road.
Found some more small trees to add as well.
Grasses and scrub plants added to the creek bed.
Top-down view, pre water effects.  Everything else complete.
Final layout.
Here we are at Historicon, post water pour.  I used two-part epoxy and after some trial and error, got it to work as desired.
I'm quite pleased with how it came out and it made me feel comfortable if I want to attempt making my own terrain.  The little bridge was pretty fun to build and modify too.  I may need to make another one for this year though if I bring a Japanese list.